|
The Fleet Office Activation App is used to easily activate a tracker from your phone.
You can test and assign the tracker to the Asset instantly.
PLEASE NOTE If you are de-activating an old 3G Tracker - Please ensure you phone our Hardware Team to process the de-activation/ removal of old tracker first.
Contact:
|
Step 1 - Plug in Tracker
|
- Plug the tracker in
- Start your asset and wait for the lights to stop flashing before proceeding with the activation.
- If the tracker has green and orange lights, both will need to display a solid light.
- If the tracker has input and output lights, Output 0 and 1 will need to be solid on.
|
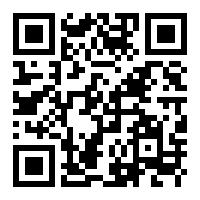
Step 2 - Scan QR Code
|
|
IF YOUR PHONE LOCATION SERVICES ARE NOT ENABLED IT WILL
SHOW THIS NOTIFICATION
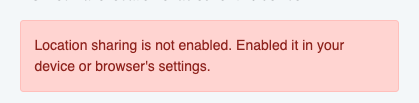
Please Note: Ensure you select 'allow' as the App requires you to be within certain distance of the tracker to be able to activate it.
|
Step 3 - Company Details
|
- Enter your name and the company you work for
- If you are an auto electrician, put your company name in this page, not the company that owns the asset.
- Check the “I’m not a robot” check box and select begin.
|
Step 4 - Enter Tracker Number
|
- Enter the tracker number. (This is the number on the silver sticker located on the tracking device)
- Please ensure you enter the correct number.
- Click Select
- This will then display a dashboard with current information from the tracker including GPS location. (See next step)
|
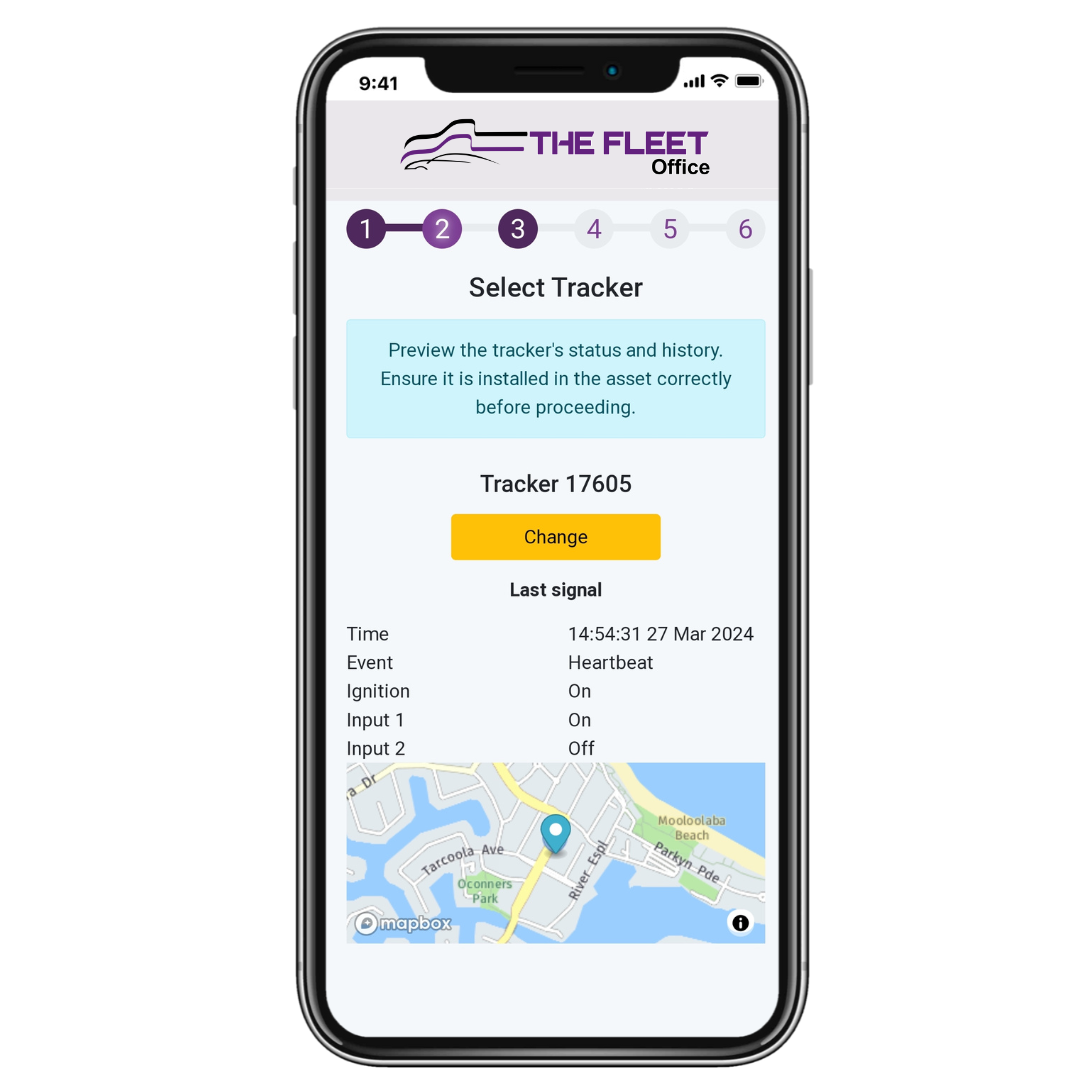
Step 5 - Confirm Tracker
|
- Confirm the last packet of information by checking the time of last signal and map location.
- This page will also show you the mobile and GPS signal strength. If either are not connected, you will receive an error message.
- Check lights are on as mentioned above for confirmation .
|
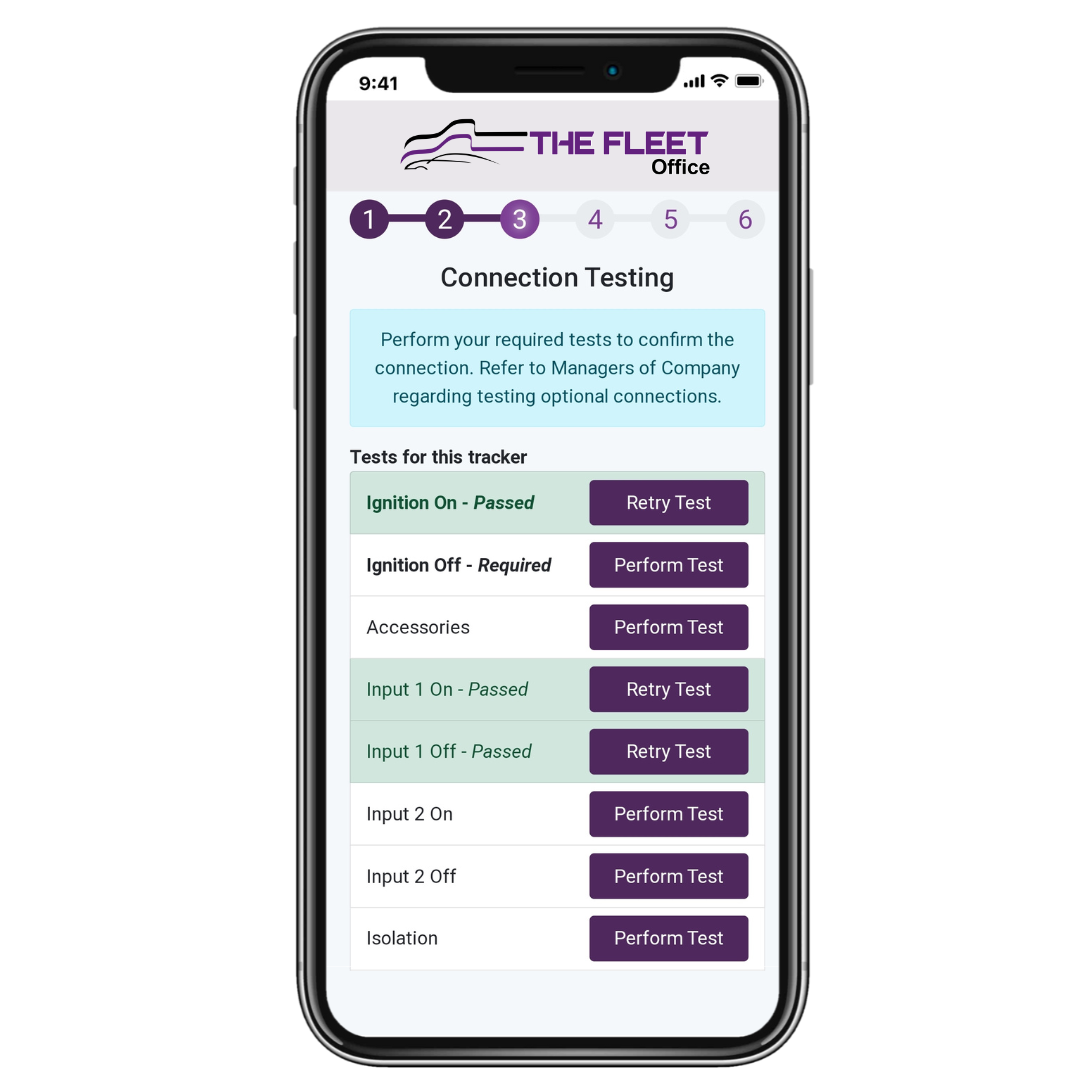
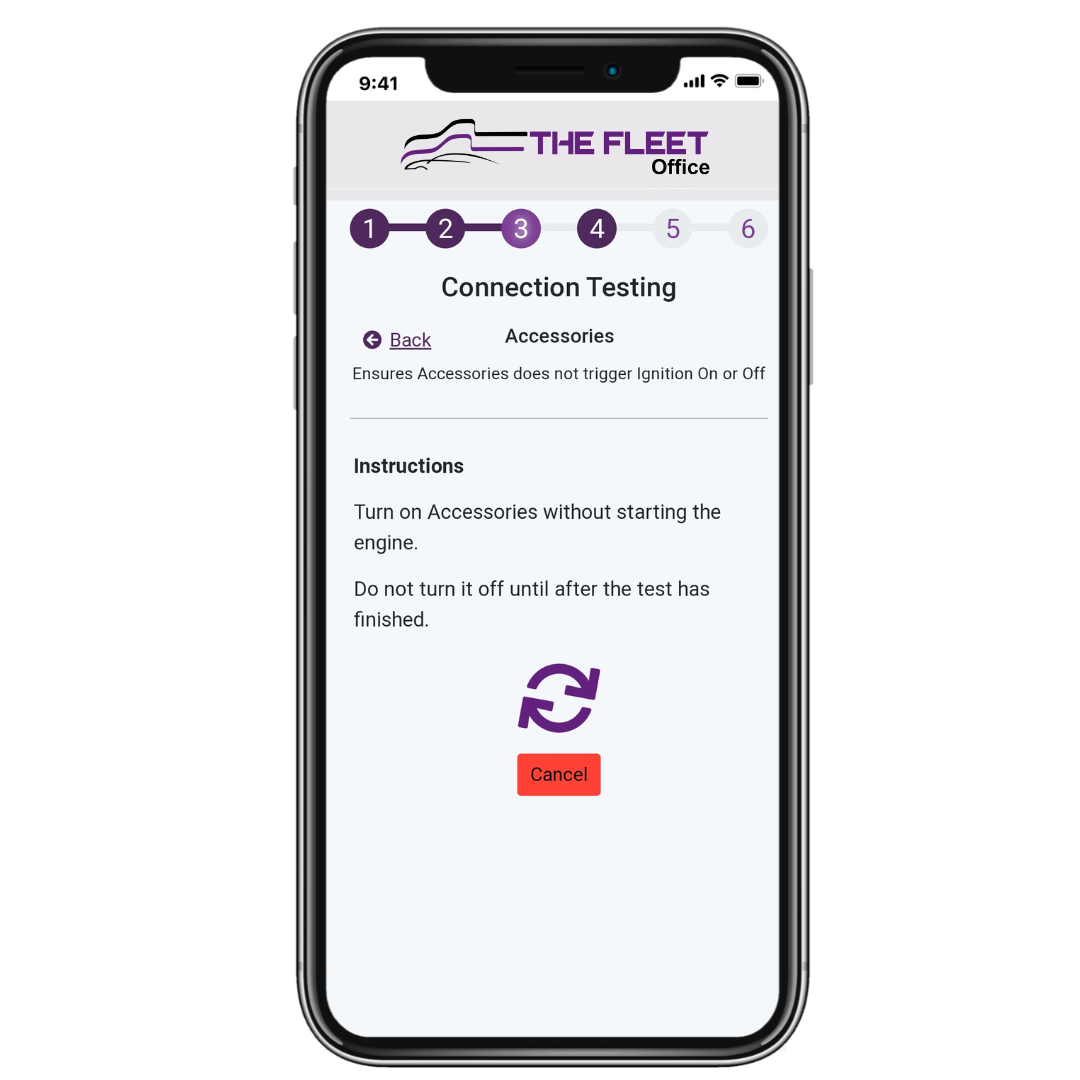
Step 6 - Run Tests
|
|
You will need to run the appropriate tests for the tracker you are installing.
- Select the tests you would like to perform one at a time and run the test
- If successful, the cell will turn green.
- If unsuccessful, try running the test again before calling the team.
- You can skip the input tests if no inputs are connected.
|
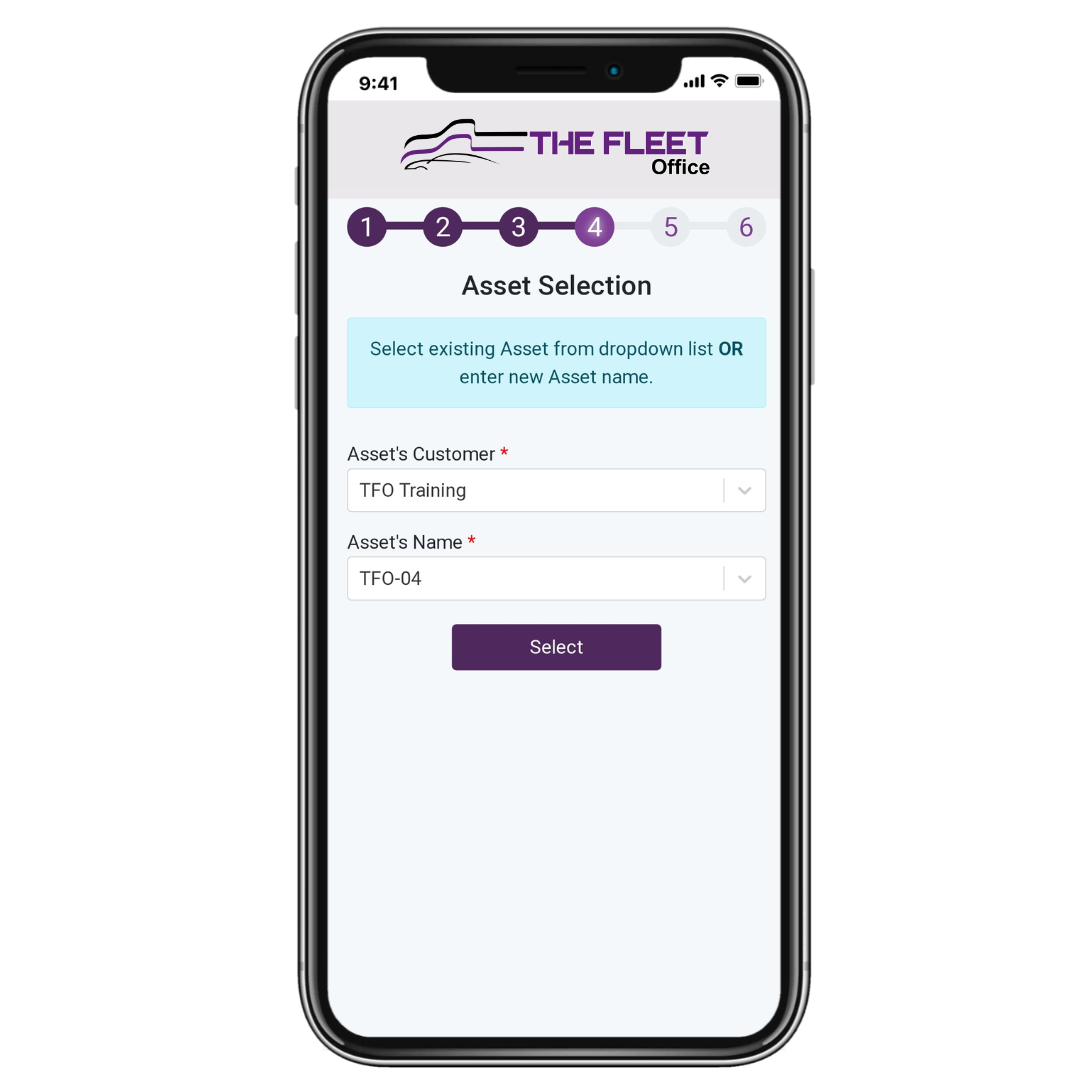
Step 7 - Assign the Tracker
|
|
Once all required tests have passed, it will be time to assign the tracker to an asset.
- First you will need to select the company you are performing the install for.
- If you start typing in the company name, you can select the company from a list that will be displayed.
- If it is a new asset that is not in the system, then select Add New and move on to Step 9.
|
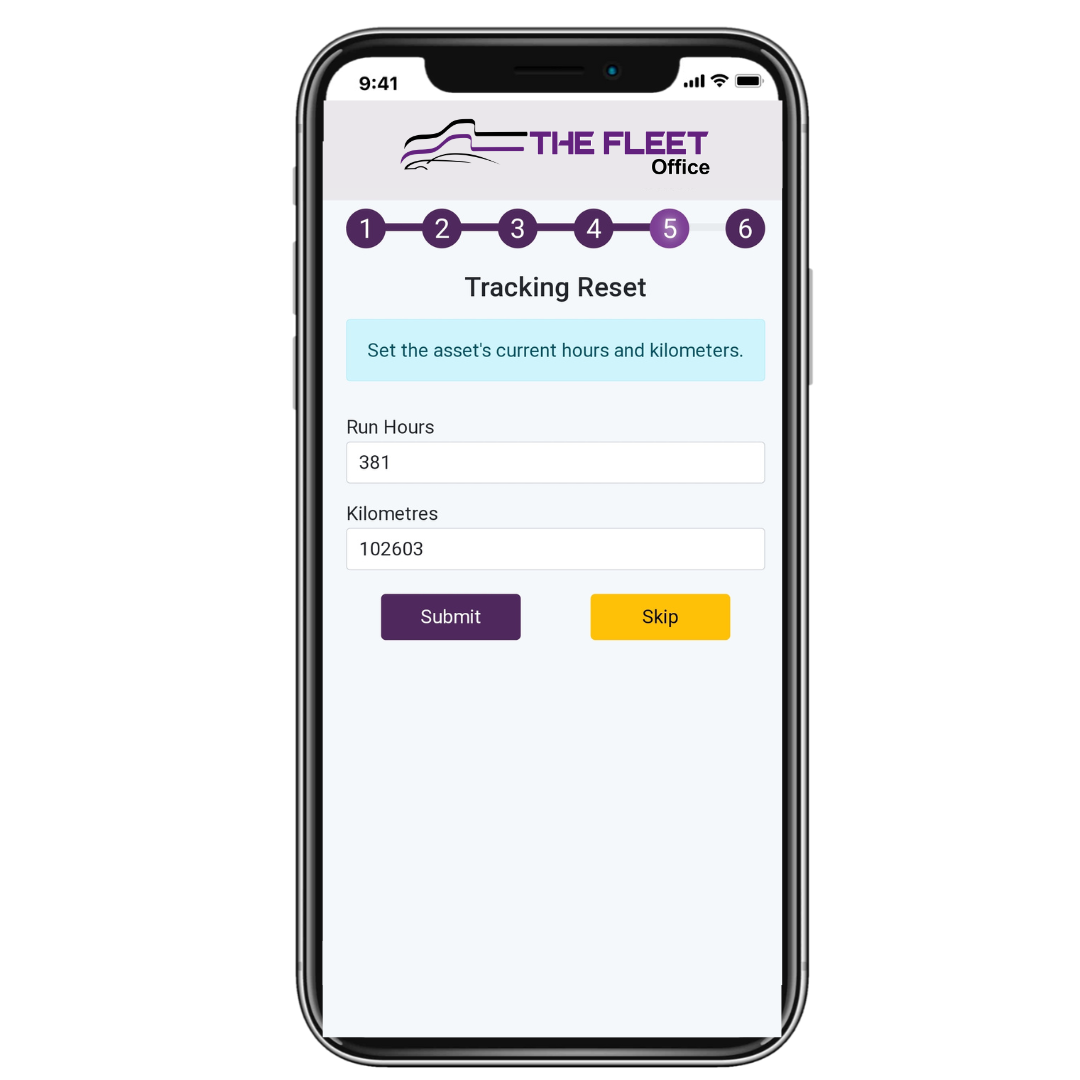
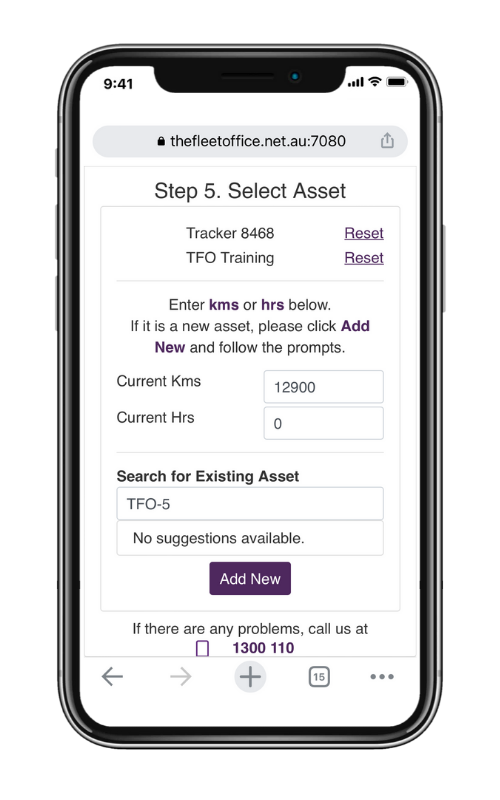
Step 8 - Asset Details
|
|
- Fill out the kms and/or the engine hrs of that particular asset
|
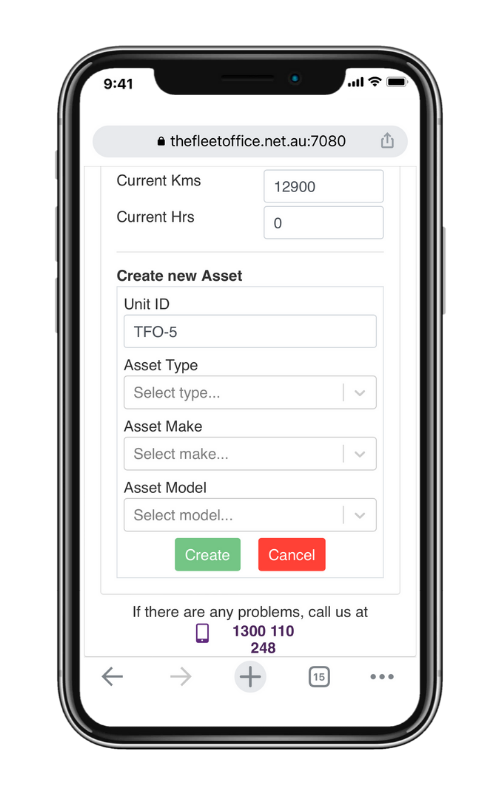
Step 9 - Add New Asset if required
|
|
*If the asset is existing and has been selected in Step 8 - Skip to Step 10
When 'new asset' button is clicked, four fields will show up on screen for details regarding the asset.
Please ensure you complete these fields:
- Enter Asset Unit ID - This must be a unique ID
- Enter Asset Type
- Enter Asset Make
- Enter Asset Model
- Click Create
|
Step 10 - Confirm Details
|
|
If all the steps are done correctly a confirmation box will show up. Double check all your data is correct.
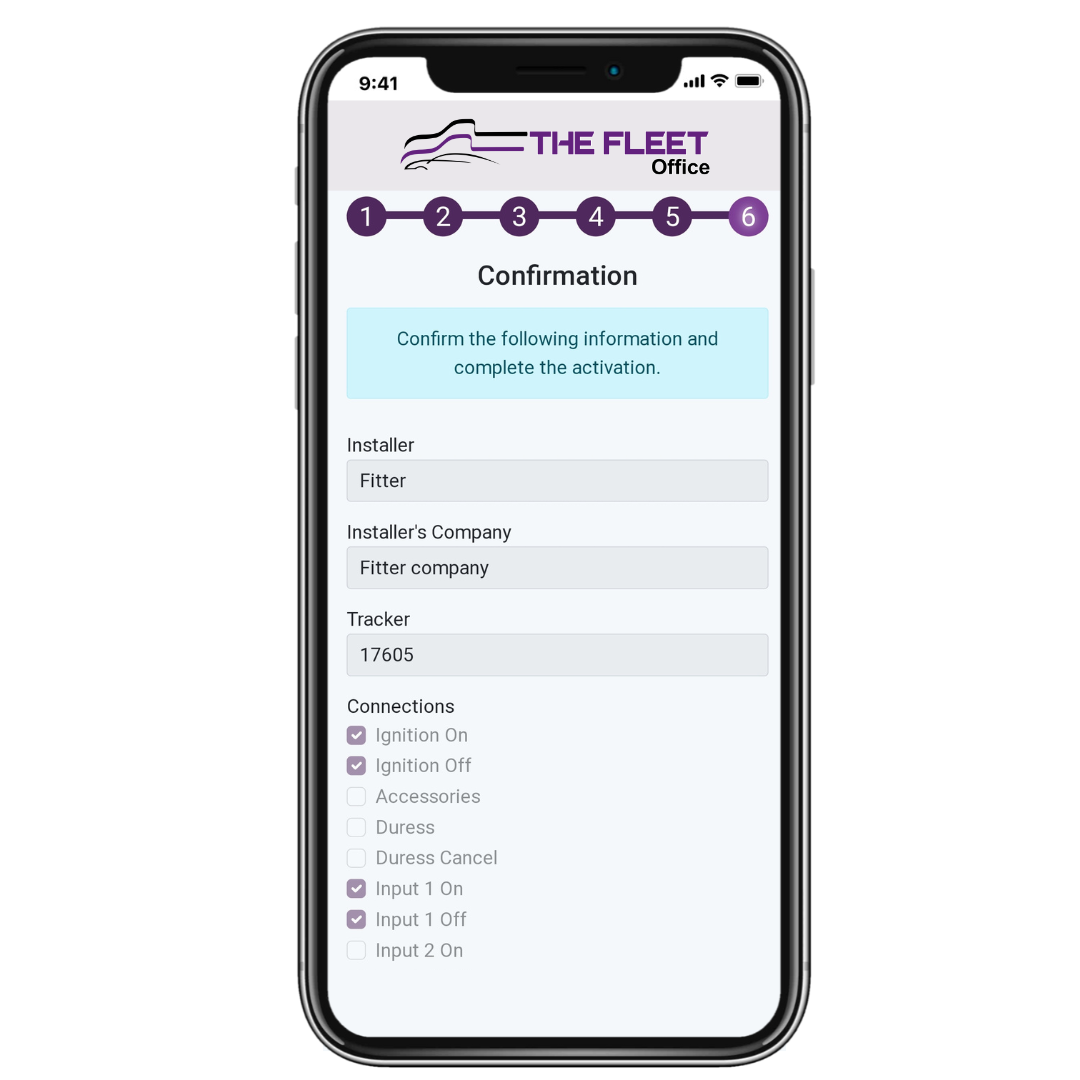
- When ready click Confirm Details and Activate
- Click on Reset if you need to correct any information
|
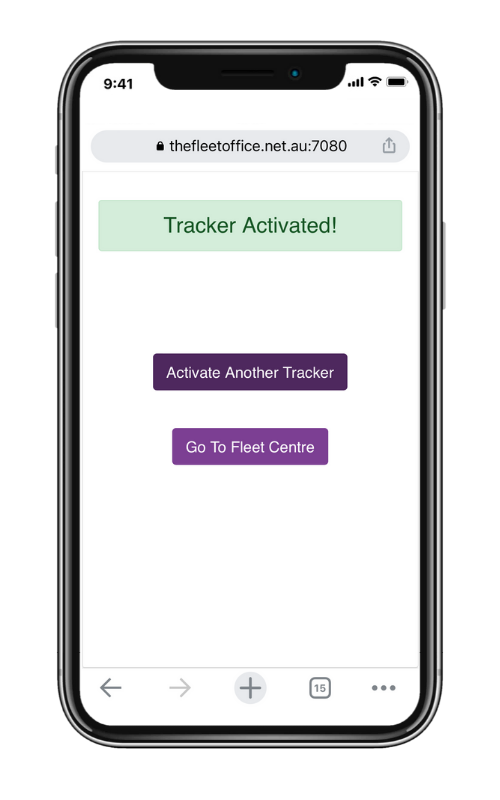
Step 11 - Activation Successful
|
|
When activation is successful you will see below
- If required, click on "Activate Another Tracker" and start from Step 1.
|